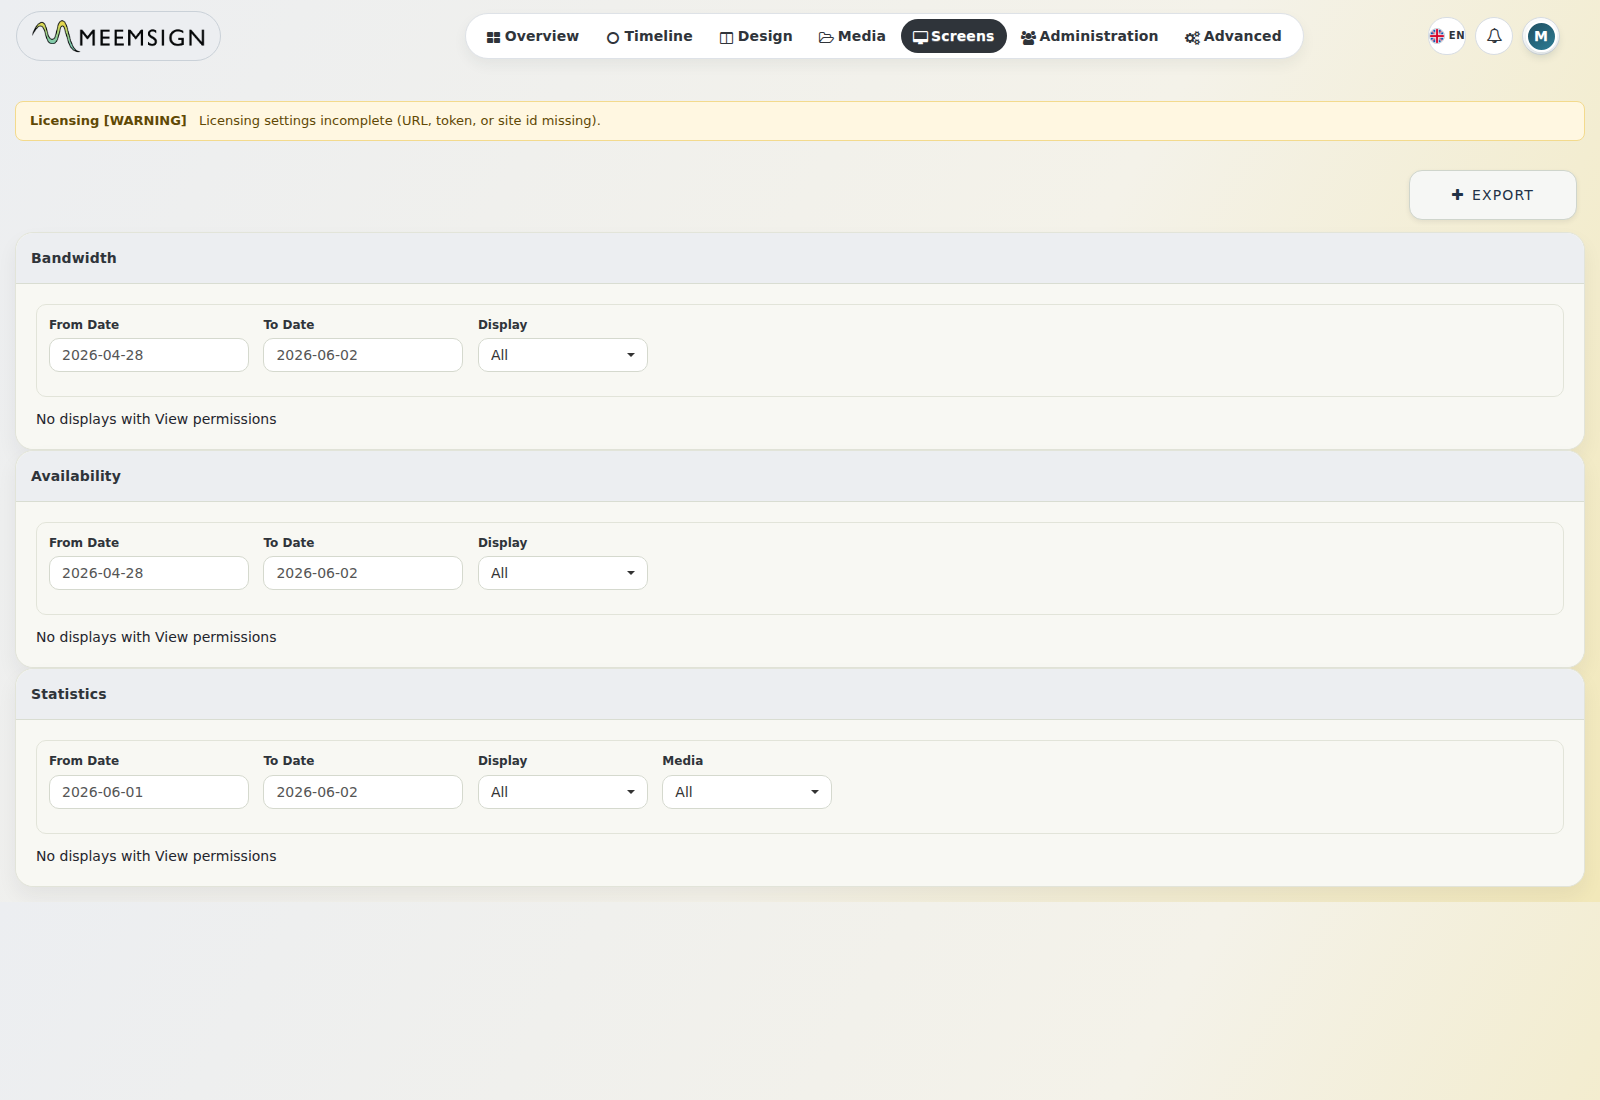
15. Statistics and Reporting
The Statistics module provides operational reporting.
- Bandwidth
- Availability
- Media statistics
- Layout/design playback statistics
- CSV export
15.1 View Statistics
- Go to Statistics.
- Select a date range using From Date and To Date.
- Select display scope.
- Review bandwidth, availability, or playback data.
15.2 Export Statistics
- Go to Statistics.
- Apply filters.
- Click Export.
- Download the CSV output.
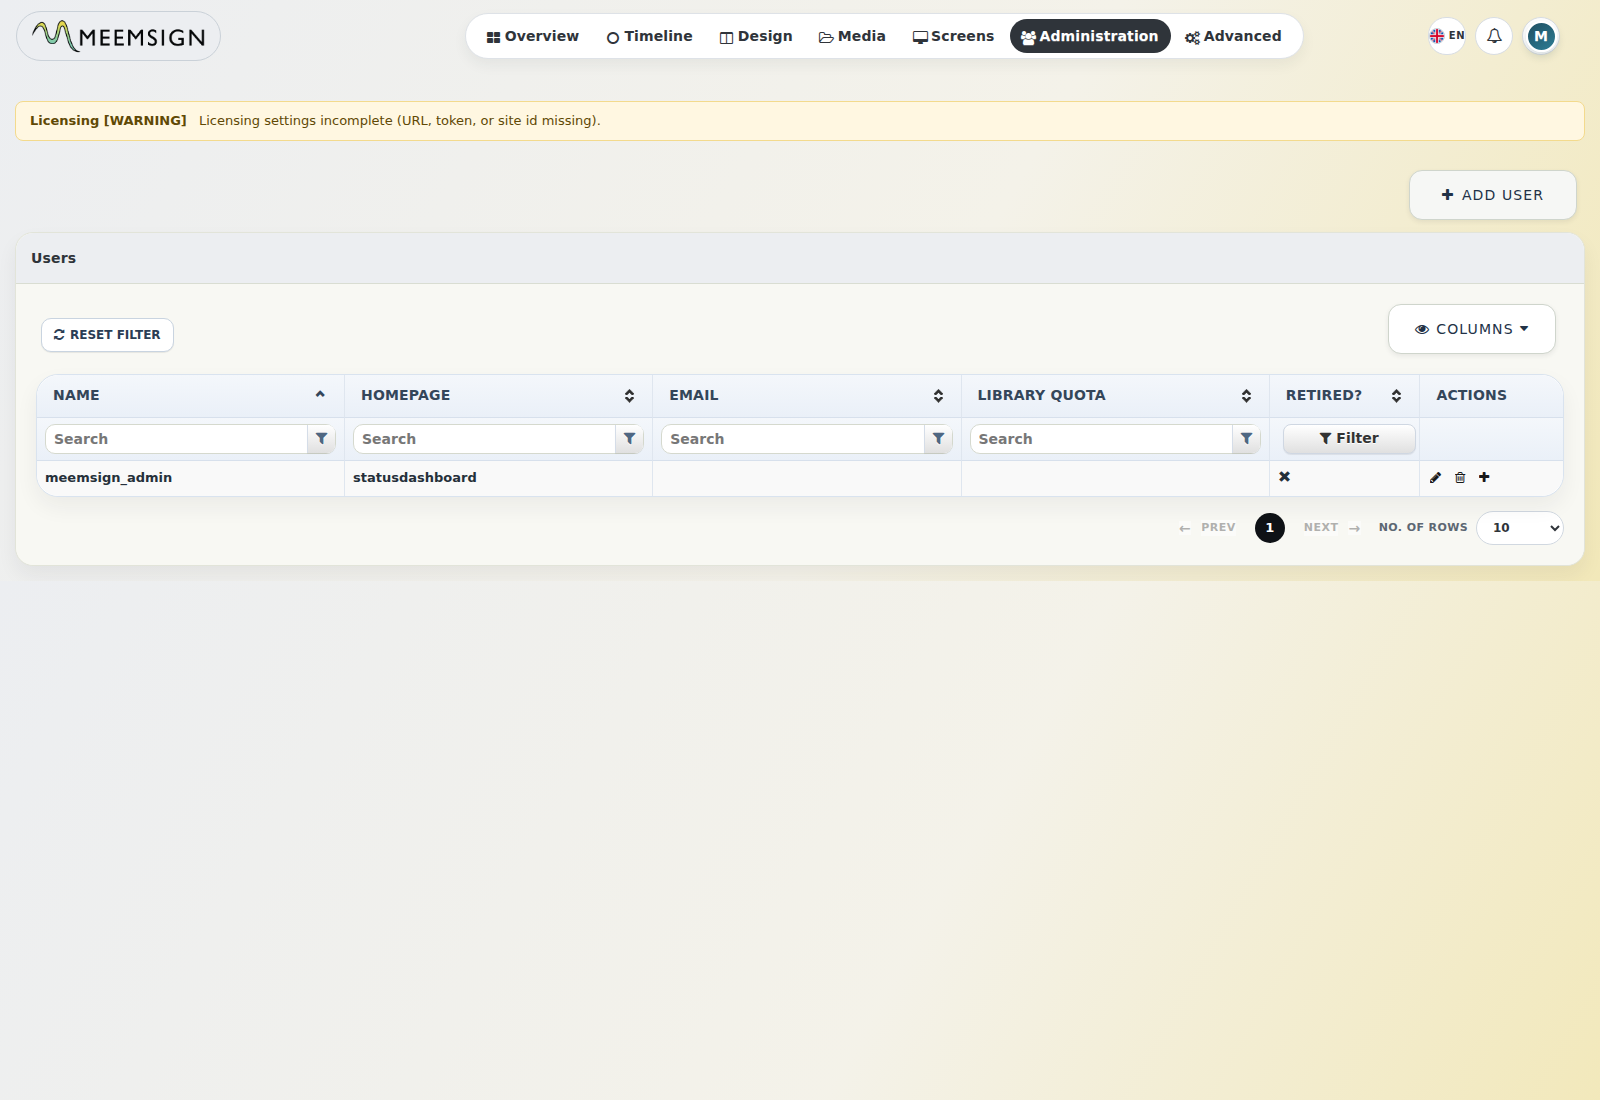
16. User Administration
User management is available under Administration -> Users.
| User Type | Purpose |
|---|---|
| Super Admin | Full platform administration. |
| Group Admin | Administrative scope limited to assigned groups or areas. |
| User | Standard operational access based on granted permissions. |
16.1 Create a User
- Go to Administration -> Users.
- Click Add User.
- Enter user name, email address, password, user type, and initial user group.
- Click Save.
16.2 Edit a User
- Go to Administration -> Users.
- Locate the user.
- Open the action menu.
- Select Edit.
- Update account details.
- Save.
16.3 Set a User Password
- Go to Administration -> Users.
- Open the user action menu.
- Select Set Password.
- Enter and confirm the new password.
- Save.
16.4 Set User Homepage
- Go to Administration -> Users.
- Open the user action menu.
- Select Homepage.
- Choose from available homepage options such as status dashboard, icon dashboard, or media dashboard.
- Save.
16.5 Delete a User
- Go to Administration -> Users.
- Open the user action menu.
- Select Delete.
- Choose whether to delete owned items where prompted.
- Confirm.
Note: deletion may be blocked when the user owns content that cannot be reassigned or removed.
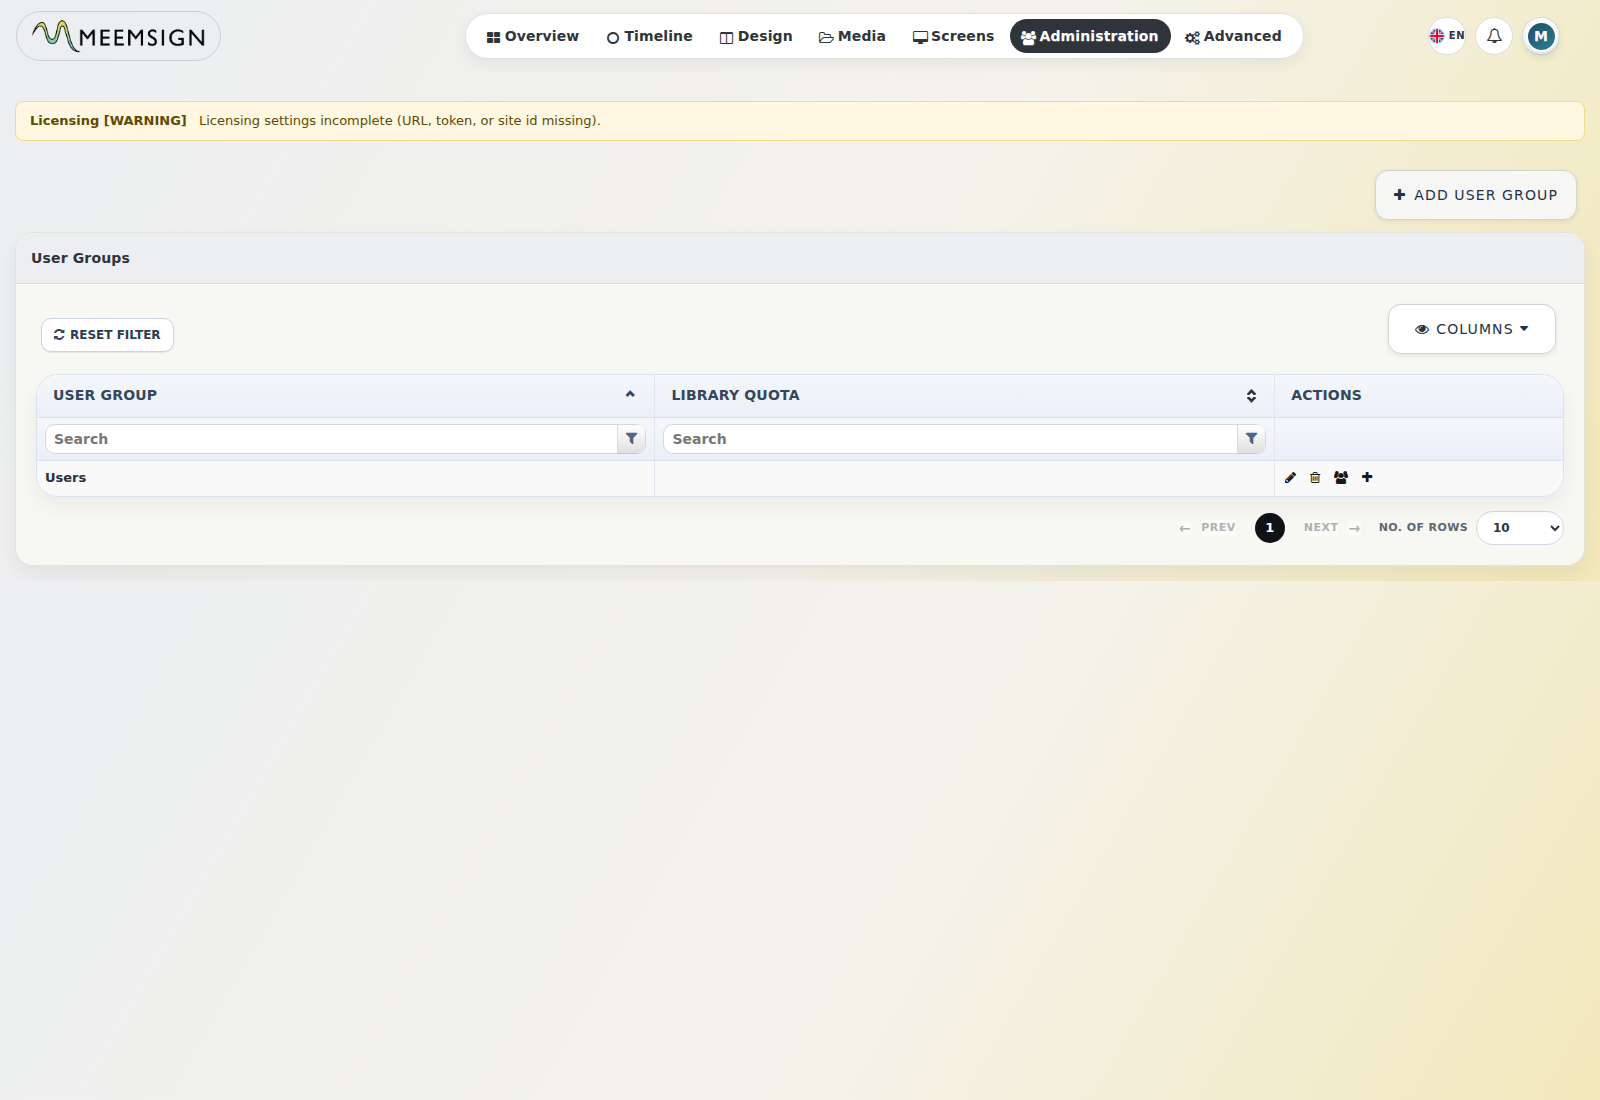
17. User Groups, Roles, and Permissions
User Groups control access to pages, menus, library quota, and item-level permissions.
17.1 Create a User Group
- Go to Administration -> User Groups.
- Click Add User Group.
- Enter the group name.
- Save.
17.2 Manage Group Members
- Go to Administration -> User Groups.
- Open the group action menu.
- Select Members.
- Assign or unassign users.
- Save.
17.3 Configure Page Security
- Go to Administration -> User Groups.
- Select Page Security from the group action menu.
- Assign or unassign pages.
- Save.
17.4 Configure Menu Security
- Go to Administration -> User Groups.
- Select Menu Security.
- Assign available menu items.
- Save.
- Overview
- Screens
- Design
- Screen Groups
- Screen Settings
- Timeline
- Media
- Administration
- Advanced
- Top Nav
- Settings
17.5 Set Library Quota
- Go to Administration -> User Groups.
- Open the group action menu.
- Select Set User Quota.
- Enter quota in KB. Use
0for no quota. - Save.
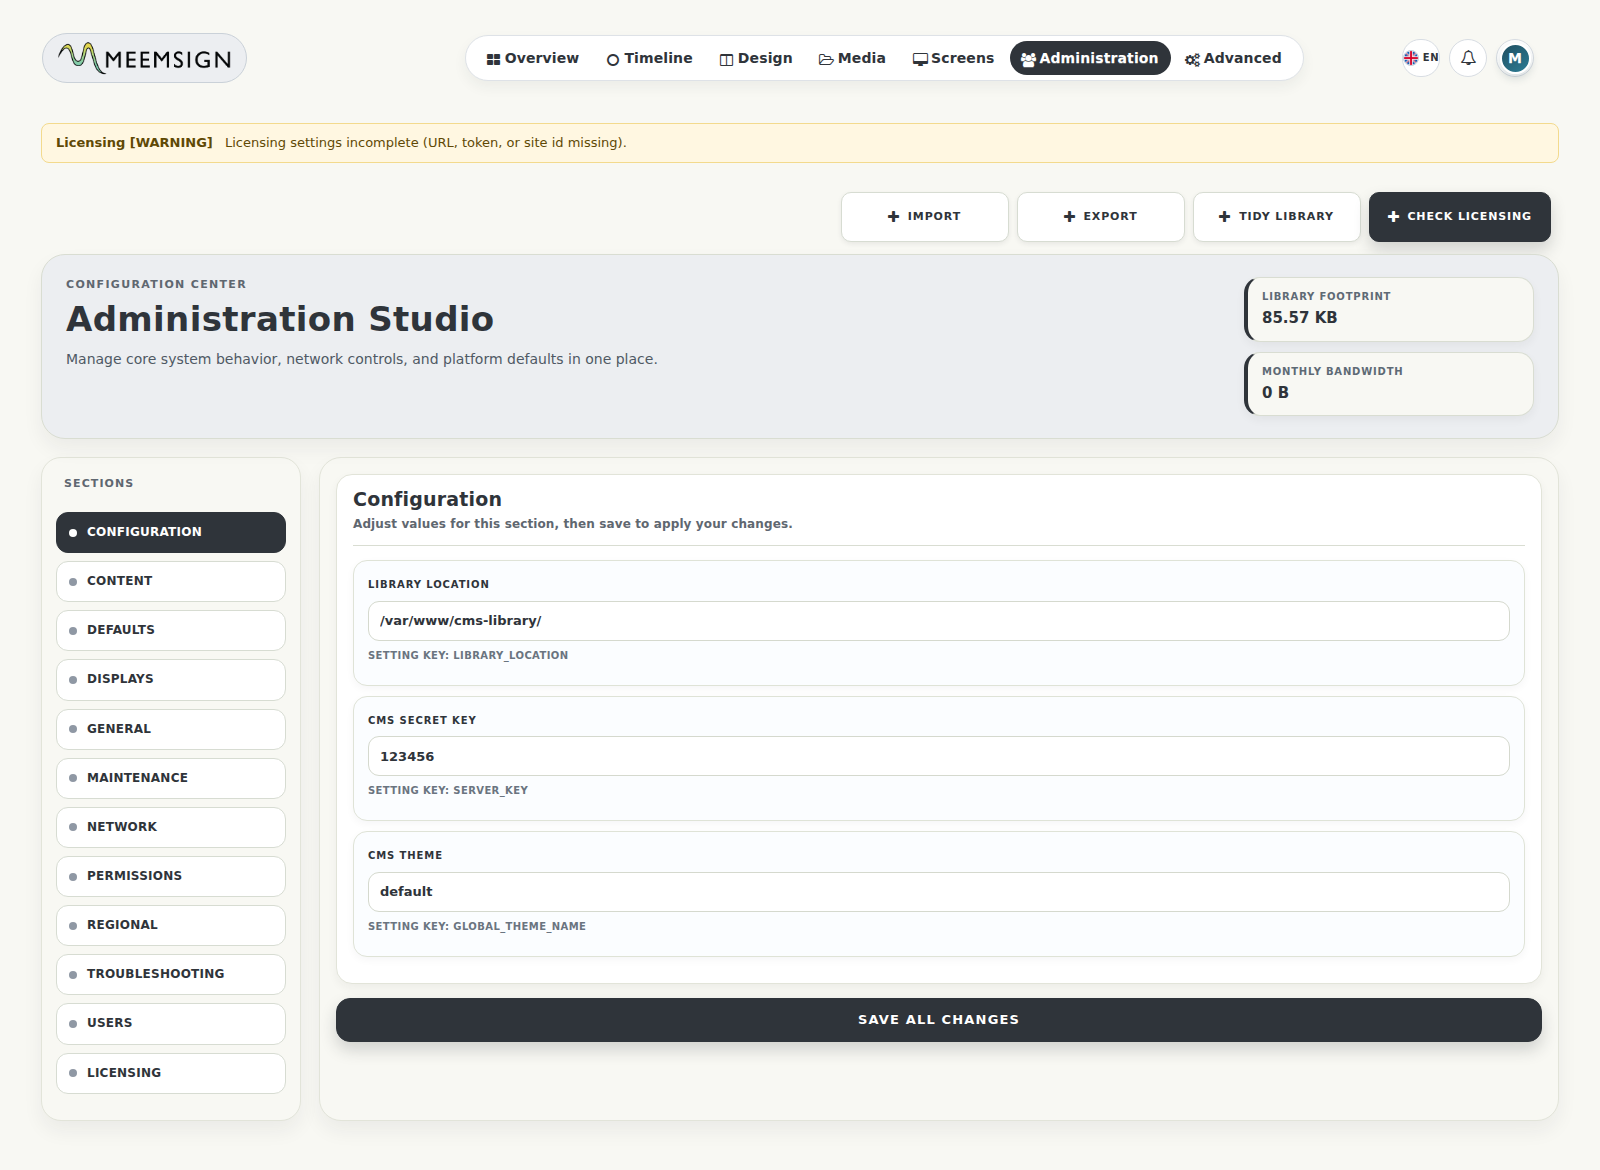
18. System Settings
Global system settings are managed in Administration -> Settings.
Configuration
Content
Defaults
Displays
General
Licensing
Maintenance
Network
Permissions
Regional
Troubleshooting
| Setting | Observed Value |
|---|---|
| Application version | 1.0.50 |
| Server mode | Production |
| Default timezone | Europe/London |
| Library location | /var/www/cms-library/ |
| Maintenance email alerts | On |
| Licensing status | Warning |
| Licensing message | Licensing settings incomplete: URL, token, or site id missing |
18.1 Update General Settings
- Go to Administration -> Settings.
- Open the required section.
- Update values.
- Save.
- Validate changes from the affected module.
18.2 Configure Licensing
- Go to Administration -> Settings -> Licensing.
- Configure licensing server URL, site ID, token, interval, timeout, SSL verification, grace days, and max licensed displays where applicable.
- Click Check Licensing to run a manual validation.
- Review status and message.
18.3 Send Test Email
- Go to Administration -> Settings.
- Locate email settings.
- Configure mail destination and sender.
- Use Email Test.
- Confirm success or review the failure message.
Important: resolve licensing warnings before production handover or renewal periods.